
I have attached my educational resume below.
Author Archives: Sydney's Inquiries
Welcome to my blog! Here you will find expression, opinions, my learning voyage, and my personal journey to becoming an elementary educator. I hope you enjoy your visit and allow for inspiration to be the reason for your stay.
I am currently living in Regina, Saskatchewan which is situated on the territories of the nêhiyawak, Anihšināpēk, Dakota, Lakota, and Nakoda, and the homeland of the Métis/Michif Nation. Regina is located on Treaty 4 lands with a presence in Treaty 6.
About Me
Hello and welcome to my blog, my name is Sydney! I hope that you explore my posts as they range from my resume to my educational philosophy and everything in-between.
I am currently in my fourth year of the elementary education program at the University of Regina and will be finishing my degree in the fall of 2022. I grew up in the small town of Choiceland, Saskatchewan where I attended K-11, and then moved to Tisdale, Saskatchewan where I attended grade 12 and graduated in 2018. My interests and hobbies include everything and anything Disney-related, spending time with my dog Scarlett, letting my creativity run free through crafting and video editing, and a good trip to the mall! Ever since my first trip to Disneyland I became hooked on the magical, happy, and overall atmosphere of the park. When I am able to be in my own educational space I want to replicate this feeling in my classroom to help build trust, relationships, and a happy place for my students.

My experiences in the classroom so far consist of being placed in a grade 4 classroom within my ECS 110 class, where I was able to take part in the daily activities that the teacher had set up for his students. I was able to participate, lead as an example, help students when they had questions, and observe the teacher and learn about tools that worked well in his classroom. In ECE 325 I was placed in a grade 1 class in Ecole Harbour Landing Elementary School. Here, I strictly observed students’ behavior, how they responded to their lessons, and observed the teacher and how she treated different learning strategies and different events that took place within the classroom. In my ELNG 200 class, I got to be much more hands-on. I was placed in Holy Rosary Community School where I worked with children who needed some extra support with the English language. My time at Holy Rosary was cut short as the Covid-19 pandemic ended it three weeks early, but the time I did have there was spent with two assigned students to myself specifically where I was able to help them read, write, work on papers, watch videos, and get to know them as individuals.
My educational journey continues as I am in my pre-internship. Upcoming in March I will be taking part in the final section of my pre-internship (otherwise known as a three-week block). Within this part of my journey, I have finally been able to create and apply my lesson plans to a classroom, in this case, Kindergarteners! After my pre-internship, there is only one thing left to do in the fall, which will be an internship that will take place over the course of three months. I hope to return back to my hometown to take part in my internship and blog throughout this chapter of my life. After all, this time next year I will be finishing my program as an elementary education student!

Personal Achievements/Education
Education:
- 2004 – 2017: William Mason School, Choiceland, Sk. Pre-school – Grade Eleven
- 2017 – 2018: Tisdale Middle and Secondary School, Tisdale, Sk. Grade Twelve
- 2018 – Present: University of Regina Elementary Education Program (K – 5)
Volunteering:
- Coop events, community skating rink, decorating committee town/high school, town clean up, senior bake sales, etc.
Awards/Achievements:
- Graduated from Tisdale Middle and Secondary School 2018
- Took part in the following clubs: SRC (Student Representative Council), Library Club, Nipawin School of Dance, Drama Club, and Canteen.
Teaching Philosophy
My overriding teaching philosophy is to build strong relationships with my students through fostering healthy and trustworthy connections in the classroom. Alongside ensuring that all students are able to grow mentally, physically, emotionally, and socially with the proper support systems that they need to be successful in not only their education but their personal lives as well. I will always strive to achieve success in my classroom for all of my students through keeping up with technology, ensuring my students feel safe and secure, having a routine so that students are able to feel constant daily practice and a sense of control throughout their day, inspire and lead as a role model, empower students to always reach for their highest aspirations, understand that each child entering the classroom may be at a different learning/reading level, and being able to help each student grow and progress successfully to their fullest potential.
I will always make time for students who need extra support and reach out when I need extra support within my own classroom. I will evaluate students on the type of learner they are (visual, auditory, kinesthetic, reading/writing, logical, social, intrapersonal) and make the appropriate modifications and adaptations. My role as a teacher will be to show up every day with an open mind, positivity, care, respect, dedication, and support. I will always show up with high expectations for my students and guide them through their educational journey to reach success. I believe that I will not only be teaching them, but they will also be teaching me along the way. To allow for this to be achieved, I will always keep an open mind to learn new strategies, skills, ideas, and philosophies.
Within my classroom I will ensure that students are equipped with problem-solving skills, an environment where they are able to thrive, the ability to facilitate change and feel empowered, grow through feedback, and have discussions that are diverse and individualistic. As a teacher, I must create a nurturing environment to support successful individuals, and promote growth and development.
To ensure that I am always evolving as an educator and growing with my students, I will seek advice from my mentors and participate in professional workshops that allow for professional development to advance. This will lead to better support systems within my classroom, richer knowledge, deeper thinking, and valuable feedback on my leadership skills. To achieve accomplishment with my students I will dig deep into topics that I believe must be taught within the classroom, such as truth and reconciliation, culture, worldviews, beliefs, and diversity. While also achieving my philosophy of having all my students become empowered, creative, supported, committed, and successful individuals who will continue to grow and prosper even after they move forward from the four walls of my classroom.
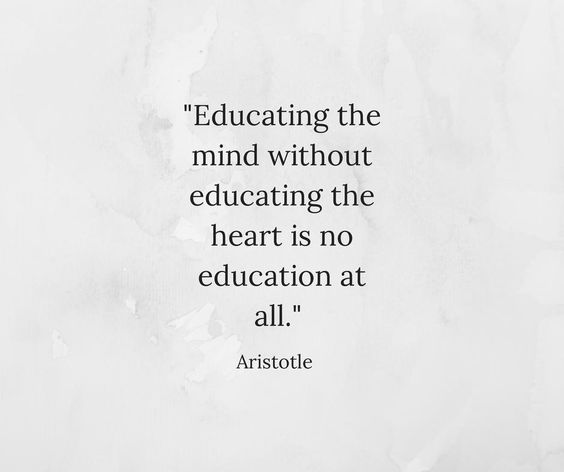
Educational Quotes
Here I have compiled some of my favourite quotes that are geared towards education, teaching, and having passion for your job.
Education is the most powerful weapon which you can use to change the world.
– Nelson Mandela
Our job is not to prepare students for something. Our job is to help students prepare themselves for anything.
– A.J Juliani
Education is the key to unlocking the world, a passport to freedom.
– Oprah Winfrey
Under the Sea
Hello everyone! Welcome back or welcome to another blog post in my series of sugar cookies and royal icing. Last week I created crowns that were inspired by Walt Disney’s classic film Sleeping Beauty. This week is slightly similar in the sense of inspiration. If you read the title you may have already made an educated guess on this weeks theme, The Little Mermaid! If you are not familiar with the movie The Little Mermaid, the plot is based around a mermaid named Ariel making a deal with a wicked sea witch named Ursula. In the deal, Ursula makes Ariel human but takes away the power of Ariels voice so that she is no longer able to speak or sing. In the time that she is human (three days) Ariel must make Prince Eric fall in love with her. Now, I am not mermaid shaped cookies, or sea witches, but I am making something deeply inspired by the film and its setting: seashells!
Using the same sugar cookie recipe as my prior weeks, as well as using my trusted royal icing recipe, I felt as though I was set for success. Lately I have been feeling a little bit beat by my own learning project. Rather than my cookies and designs becoming progressively better, they were becoming all on the same level of satisfactory and I felt as though my improvements were becoming slim to none. This week I knew that I needed to step up my creations and have faith in each process. I worked slowly and thoroughly through each process, adding extra icing sugar to my royal icing batch to make it thicker and easier to lead, and then creating a new batch of icing and converting it to make it thick and non-flooding. If you read my learning project blog post from week three titled Welcome to Cloud 9 you may remember that I did a layer of flooded icing and then a thick layer of puffed icing. That is exactly what I wanted to do again this week with the slight change of using two colours instead of one, adding edible pearls, and using a more advanced design. The seashells have been my hardest design yet as they have more ridges, smaller crevices, and then a sharper shape at the bottom. I made sure that my icing would be extra thick for this batch and was ready to create my product.

On Monday night I baked the cookies, let them sit in the refrigerator for an hour while I took my puppy Scarlett out for a walk, came back and cut the cookies, let them bake in the oven, went to another class as they cooled, and after class I added my base layer of icing. After my base layer was complete I left them it on a cookie case overnight to ensure they were completely hardened, and then added the ridges and the pearl to each individual cookie once I woke up in the morning. Once I completed the cookies and the ridges were hardened, I stood back and for the first week since week number three I was truly proud of my creation. This week I also created my first ever Instagram reel! I am proud with how it turned out and I hope all of you will give it a watch as well since I spent more time than I am willing to admit on it! I added music, different processes, and the final product in the reel, please let me know what you think of the reel in the comments below!


Once again, I took the cookies to the staff at work and was greeted to some lovely comments written on the white board in the staff room about my cookies. I have found a new love for my learning project and I hope that that reflects in my final project for this week! For weekly updates on my learning projects, educational recommendations, and more follow my Twitter! I hope you all come back to read next weeks blog post, stay safe and healthy everyone!

Technology and Creative Thinking
Let us begin with a brief overview of YouTube and its large progression over the past sixteen years. YouTube is a video sharing platform that has gained popularity over the years and has become one of the most popular platforms on the internet. YouTube was first launched in the year 2005 and all began with a video titled ‘Me at the zoo‘ which lasts for a total of nineteen seconds and contains a man standing in front of a heard of elephants at the San Diego Zoo. Coming across a video title that actually has something to do with the content of a video nowadays is hard to come by especially since ‘clickbait’ has become a very common tool to get views and engagement on a video. YouTube has also created a platform for regular everyday people to create a name for themselves by uploading consistently on their own YouTube channels and gaining an audience based on their personalities and the creative ideas they come up with. When someone, such as myself, comes across a channel they enjoy they can subscribe to that person so that they are notified every time that channel uploads a new video. For example I am subscribed to a few channels and watch their videos every time they upload, and every time I watch a video they earn a view from me as well as Adsense from me watching the video and viewing the ads they have placed throughout. YouTube started as a platform to upload videos and turned into a website where users can earn thousands of dollars through brand sponsorships, AdScense, money per view, selling their own merchandise, and even creating their own brands, promoting it and then making money through this as well.
Now, when it comes to using YouTube as a tool within the classroom I find that it could be very useful as it holds great informative content that contains valuable information. Whether you are teaching or learning about anatomy, greek mythology, number theory, the history of Shakespeare, etc., there will always be content based on what you are searching for. As stated by Michael Wesch in the video An Anthropological Introduction to YouTube “9,232 hours of footage is uploaded everyday” meaning that all hours of footage are accessible to anyone who has access to YouTube, and this was statistics all the way back from the year 2008. Since then the footage per day being uploaded to the platform has changed to 720,000 hours a day which works out to 500 hours every minute. This is a lot of information to take in, but you may be wondering, how does YouTube as a whole effect teaching as well as the outcome of my future classroom?
As a future educator I see the benefits of bringing YouTube as a whole into my classroom, doing my research on the videos I present to my students, as well as make sure it will benefit the learning process for them as well. In Educational Technologies 300 we spoke about the good, the bad, and the ugly when it comes to social media. However, as an educator I hope to teach the importance of being safe on the internet, not just on YouTube but on all forms of the internet that students may come across or feel as though they should make a public account. These forms include Snapchat, Twitter, Instagram, Facebook, TikTok, and whichever new forms of social media are released within the years I teach. Twenty years from now the world of social media and the concept of the internet will not be the same as they are today, but how it will differ is beyond me at this time. When I was in elementary school we had a box television on a cart that also had a CD and VHS player, this was as close as we had been to getting information in video format, but the teacher would have to watch through movies and tapes just to find information that would be valuable to us as learners. Now teachers are able to put a certain topic into the YouTube search engine and they are given dozens of results and informational videos based on the search, which in my opinion is a great advantage.
There will always be advantages and disadvantages when it comes to the internet. We, as future educators, need to be aware of the trends, social media platforms that are taking off, what the students we are teaching are interested in, and how their presence online is affecting them personally. As for schools in general, from Kindergarten to University, I personally feel like technology has had a very strong and positive roll. Throughout the time we have had so far within the pandemic technology has allowed for classes to continue, for community to be built, and for us to stay connected even when we are apart from one another. We meet through zoom, hand in our assignments through school websites or email, connect through Twitter and Slack, and write out our thoughts on blog posts. Without technology this would not be possible. It helps each and every one of us as future educators in understanding how the world of education can still progress and benefit with technology. Now that we have each dealt with the negatives of a pandemic we will be able to carry out learning and be more educated on how to implement different platforms into our classroom diligently and appropriately.
To complete this blog post, let us share our favourite YouTube channels, they can be educational or channels you prefer to watch on your spare time, and a brief description. Maybe we will be able to connect through shared favourites or even be treated to a new channel that we have never discovered before! I will begin: Emma Chamberlain (vlog style, fashion, cooking), Mia Maples (home renovations, hauls, trends), Good Mythical Morning (taste tests, reviews, games). Please leave your top channels below! Thank you all for reading!
Make It Pink! Make It Blue!
Hello everyone, welcome back or welcome to another blog post in the series of my royal icing and sugar cookie collection! We are getting closer to our final week of our learning projects everyday, and I am beginning to think about what I want my final project to be! Of course I want it to be my biggest and best piece of work out of all nine weeks, but this weeks outcome I have become quite proud and fond of. I have also found that through my weeks of creating and decorating cookies that my favourite part is sharing them with the people around me, and seeing their reactions to my creations. Sometimes I find myself disappointed in the final product, however, when I take them to staff members at work they always see the best in the final product and seem grateful, which in my opinion makes it worth the trial and error!
If you know who I am, you will know that I am a huge Disney fanatic and try to bring the magic of Disneyland into my everyday life. Whether this is playing the Disneyland esplanade music all day everyday in my apartment, watching vlogs of others enjoying Disney World or Disneyland on YouTube, or creating copy cat recipes of my favourite dishes served on park property, I always strive to bring a touch of magic into my life especially since a trip to the parks is a no-go at this time. This weeks sugar cookie creation was inspired by Auroras crown from the classic Disney film Sleeping Beauty. You may realize that I did not make the crown in its classic golden colour palette, rather I did a play on the famous quote “Make it pink! Make it blue!” by indeed, making it pink!


This week I would like to focus on the decorating process by saying I went back to my original royal icing recipe that uses icing sugar, an egg white, cream of tartar, and food colouring. This was one of the best decisions I have made over the past couple of weeks since it stayed on the cookie right where I had originally placed it, making it a huge success as I was dealing with runny icing the last few weeks. I also took a quick trip on my lunch break from work to my local, small town Co-op grocery store and found some new sprinkles that got me so excited to use the crown cookie cutter I purchased at the beginning of this learning project. The entire time I was baking these cookies I watched Disney World vlogs on Youtube, which really set the tone for good vibes and pixie dust floating through the air.
Once the cookies had been baked and cooled, I made a pearlescent pink shade of royal icing, put it into my trusty ziplock bag, cut the corner off of the bag, and began the decorating process! I began with creating edges with the icing so that my icing would not flood off of the cookies, put royal icing into the centre, flooded out the middle with a tooth pick, and then added five large sprinkles in differing colours and sizes onto the top of the crown. The large pink sprinkles that I placed onto the middle portion of the crowns were my absolute favourite and I am so happy that they added a jewelled effect to the crown. Once the royal icing completely dried after about an hour, I moved them onto a travel tray and then took them to work to share with the staff. Not only were they excited to see yet another tray of cookies, but working on Wednesdays have become their new favourite shift!


Thank you guys for joining me again for another week of my learning project! A few more of my classmates are also working on cooking/baking-related projects that you should all take some time and check out as well! Branden Smith focuses on making a new meal from scratch every week for his family members, and then each member rates the meal on a scale from one to ten! Also, Shana Blenkin focuses her blog around baking beautiful confections from bagels, buns, and even sugar cookies! I highly recommend checking out both of their blogs as I have enjoyed them each and every week. A word of caution though, they will both make you hungry!
Thank you for visiting my blog, see you all again next week for another creation! Want in on fun sneak peaks each week? Follow me on Twitter!
Sunshine, Springtime and Ice-Cream, oh my!
Hello reader, hello sunshine, hello warmer weather! I hope you are all thriving and have been taking in the beautiful weather over the past week as the sunshine and blue skies have come out to play. For my fellow bloggers that live in the Regina area, this means that opening day of Milky Way Ice-Cream will soon be arriving, and I cannot express how excited I am for a cookie dough twister. For those of you who have never been to Milky Way or even heard of the spectacular summer time ice-cream shop, then I am here to say if you ever get the chance to go, GO! With that being said, my learning project this week was highly inspired by all things sunshine, springtime, and ice-cream! Welcome to my learning project week number five!
If you have never visited my blog before, then you have never been introduced to my topic which is making sugar cookies in all kinds of shapes, as well as attempting to master the art of sugar cookie decorating with royal icing. Last week I worked with a new ingredient as well as a mermaid tail cookie cutter. If you are interested in reading about last weeks adventures, or even any before that, they are all listed under my EDTC 300, Learning Project tab or you can click right here for last weeks post specifically. Without further ado, let us begin this weeks decorating eleganza extravaganza!

This week I used the same sugar cookie recipe that I have used throughout week two to my present week of baking cookies, however, I decided once again to try a new royal icing recipe that I was directly linked to from my trusty cookie recipe. My cookie cutter of choice for this week was an ice-cream cone which helped me decide that I wanted the tops of the cookies to range in different pastel and spring colours. Skipping the baking process this week as it all went smoothly without any problem, I allowed for the cookies to cool and the decorating began. I am visiting my mom at the moment which means I had to pack all of my baking necessities, yet I still forgot the piping bags which means I had to get a little bit crafty and cut the corners off of ziplock sandwich bags. Once I followed the instructions and the recipe for the new royal icing I divided the mixture into four bowls. One quarter pink, another quarter blue, and the last two were split into a green/yellow and then a tan portion for the cone. I put the tan coloured icing into a ziplock bag to begin piping and could tell by the consistency that it was going to be too watery. This was slightly upsetting since I know which icing recipe works, yet I tried for a different one. I moved forward and added more icing sugar to the other three colours hoping to thicken it enough to stay on the cookie without having the icing flood off of the sides and onto the counter.


After the cone section of the cookie dried I went in with pastel blue icing, covered the top portion of the cookie, and then to make it a little bit more visually appealing I added sprinkles for added texture and colour. I repeated these steps with both pink and green/yellow icing, added two different kinds of sprinkles, and the final result was both cute and delicious. This batch of cookies was much larger than the batches I had recently created, so I ate one blue ice-cream cone, packed up the other thirty eight cookies, and drove down to my summer job and left them in the staff room so that others are able to enjoy my creations as well! I have decided to stick with my old royal icing recipe using cream of tar-tar and egg whites despite being so excited to use meringue powder due to the fact that it is thicker, and does not run off the sides of my cookies.

I hope that you all enjoyed reading about my learning project this week, as every week is like stepping into a new adventure and learning about new do’s and do not’s in the baking world. Go outside, enjoy the sunshine, get your favourite Starbucks drink and take the day head on everyday! Spring is here to play, and so am I, I hope you are too! I will see you all next week with another update. If you are wanting to read some extra content here is my first blog post based on my learning project, and here is my Twitter account! See you all again soon!

Mermaids and Meringue
Welcome back or welcome to another week and another update on my learning project which consists of making sugar cookies and decorating the final product with royal icing! In my last learning project post Welcome to Cloud 9 I explained how I was waiting for my meringue powder to arrive so that I would be able to create a different recipe and consistency with my royal icing, while becoming impatient for my Amazon order I went to Bulk Barn and behold, they got meringue powder in! The adventure for my ingredient has officially come to an end and I have a feeling you are all as relieved as I was since you no longer have to hear about it (for now). This blog post will be a little bit different since I will not be explaining my learning project, rather you will be able to watch it here on YouTube and read about the video editor I used called Animoto!
Not only is there a blog post from me this week, but there are also two videos to go along with it (you only need to watch one as they both contain the same elements, just a different editing software was used for the videos). I first used iMovie to lay out my idea, incorporated my favourite non-copyright music, and had some fun with the project. If you wish to watch the iMovie version it is right here. However, I have been using iMovie to edit my YouTube videos for over a year now so I went on an adventure to find another video editing software that I had never used before, and that is when I found Animoto. I spent hours trying to figure out how to upload videos onto Animoto and finally resorted to looking up other videos on how to use the video editor, sounds ironic but it worked, a special thank you goes out to Sally from How to Create a Video with Animoto. After I finally figured out how to use the new editing software and explore the website as a whole. I compiled a personal list of the positives of using Animoto as a classroom tool and also how to get around in the quickest/easiest way.

First off, if you prefer to use videos rather than pictures when using Animoto, the easiest way to put them into the website is to download each video off of your phone or camera, then transfer them onto your desktop, then enter your desktop through Animoto, click the video you would like to use on your slides, and then enter them in. It is easier than it sounds and after you do it once you will be flying through the next videos you would like to upload. Now, if you are only interested in using photos it is much faster as you just download them straight onto your laptop, open Animoto, and then download them straight onto your slides. All of your photos and videos will be shown on the right hand side of your screen and you are able to drag each individual file onto your preferred slide. Once you have them all in the order you desire you can add text, a border, or even layer other images and videos onto the same slide. I did not personally attempt the layering strategy but it would just be as easy as dragging two individual files onto one slide once you have chosen the correct layout to do so.


Another tip I have for using Animoto for the first time is choosing a template that has already been created. There are dozens of outlines to choose from. The options range from different aesthetics, colours, topics, and you can even choose a blank canvas. After you have clicked on the slide you have full range of control when it comes to the videos/pictures used, colours pallets, text fonts, and borders. As stated earlier, you have full creative control when choosing a template, even though the outline is there to guide you and lay out different ideas for you, you are free to change the slides appearance and move around both the text and images. Once you have completed your project Animoto has a wide range of non-copyright music to chose from, all you have to do is click the song name on the left hand side of your screen in the music library to listen to it, if you like the song press the add button to add it on top of your video! Lastly, if you are wanting to upload the video to YouTube, Twitter, Facebook, or even email it to someone then click on the export option in the right hand corner of the screen and all of the options are open to you. Once you have clicked your preferred route of upload it will automatically upload within two to three minutes and you are all set. Your work even automatically saves for you so that you are able to visit it again later in your library!

When it comes down to applying the tool Animoto into the classroom, I would recommend it to both future and current educators as well as use it as a tool for myself. I defiantly see this version of editing software as an application for the teacher to use rather than the students. The reasoning behind this is Animoto is slightly difficult for students in elementary school to use. The uploading to different areas of both your computers documents and the slides provided by Animoto may be both challenging and frustrating especially for young children. I am in the elementary school program so this would not be a software I would allow my own students to use, but rather for the teachers to use on their own to bring something different and intriguing to their lessons. I find Animoto especially useful for the online classroom world as you would either be able to share your creation over zoom to your students or link it in an email to send to their parents. The layouts that Animoto provides would be beneficial when creating an informative based video on either an event or upcoming information within their school or classroom. Animotos can be altered to hold the information necessary and photos/videos you took yourself to bring a fun and informative video that both the student and parent would be interested in. Unless you are willing to pay for the professional version of Animoto, you will unfortunately be stuck with non-HD videos and a water mark in your bottom right hand corner. If these two negatives do not bother you, then feel free to give it a try both within your personal and educational lifestyles. This was not a big downside and can be overlooked by the user.
Thank you for reading this weeks learning project blog post, this post was created to inform you, the reader, of the editing software Animoto as well as some tips and tricks I learned along the way. If you are wanting to watch my own Animoto based on the topic of my confectionary creations, I will link it again here! Thank you all for visiting my blog and reading my post, I hope that you enjoyed it and I will write again next week with another update! Stay safe and healthy.

